 [PlaidCTF 2017] [Reverse 200 – zamboni] Write Up
Description
I heard you like art. Here’s an art recognizer!
Note:
If you have trouble submitting the flag, try just submitting flag content that is in between { and }.
That was a pretty interesting RE challenge, with a few unusual stuff. Big thanks to the author for the fun.
First Impression
I always like to start looking at the binary “strings” as it can tell you pretty quickly if there will be some obfuscation, and it can help you locate relevant code:
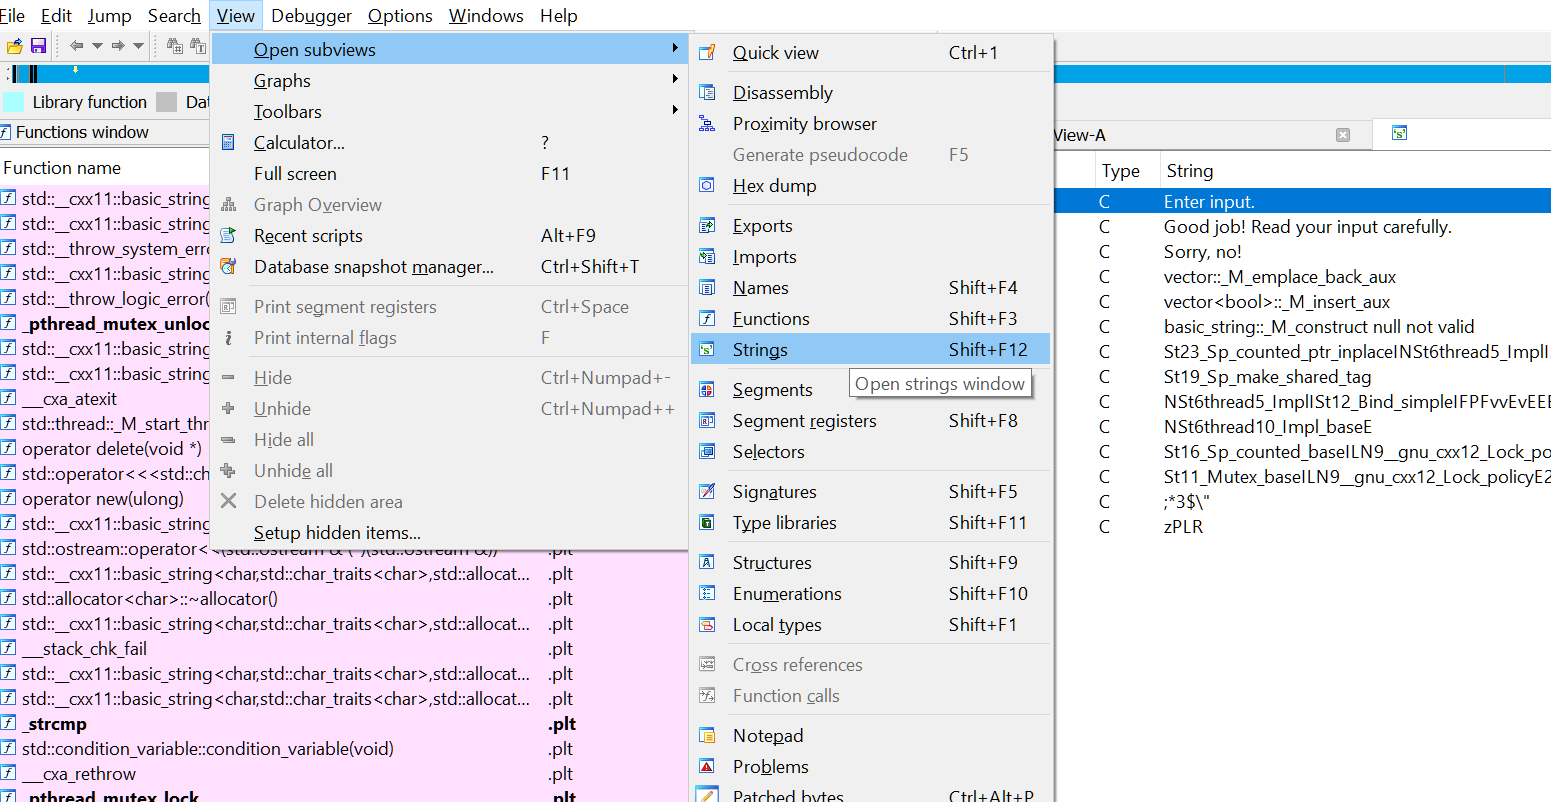
here we can see that our “goodboy” / “badboy” messages are pretty clear, and that all this is in the “Main” function.
I also like looking quickly at the imports,
there again we could see if there is some kind of obfuscation, and we can see if there are some unusuall functions:
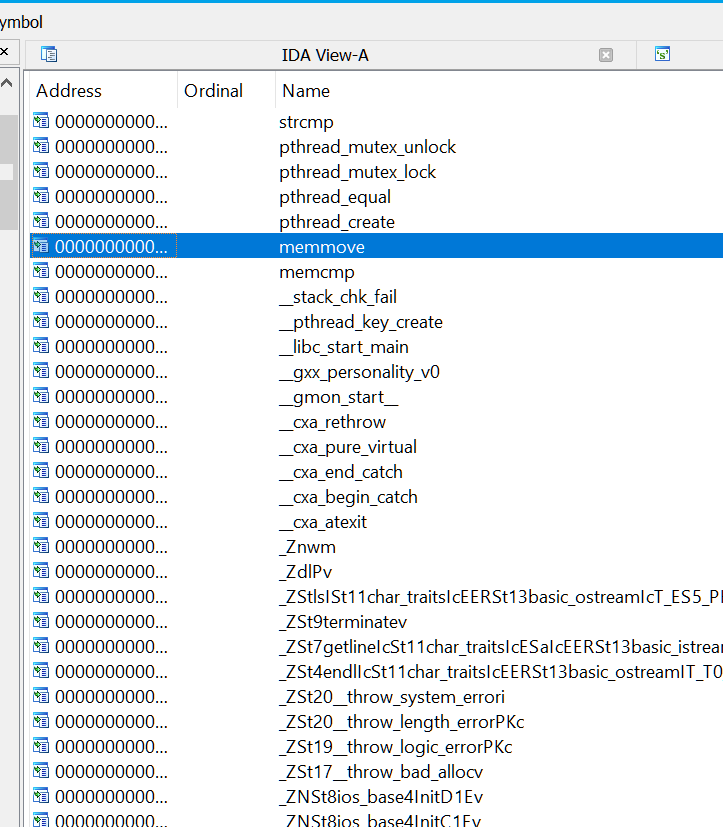
We saw some interesting stuff :
- a few import related to Thread management
- a strcmp and a memcmp that could be part of the final checking, we’ll definitively come back for these later on.
Let’s put a breakpoint on theses “compare” function, just to know when we hit them. (you could also cross ref them all the way up to the main function with some CTRL+X, but right now we don’t understand the binary enough)
First Analysis – What the F%*$ is this thing doing ?
Analysis of Main
On the first look we can see a pretty classical Main function,
We have 5 getline()
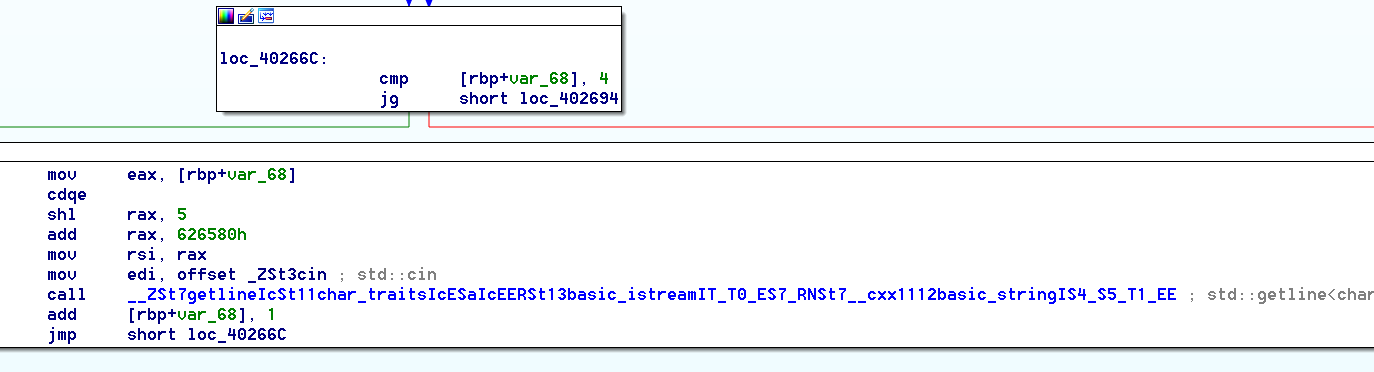
Then what seems to be a loop of 0x27 runs, probably for the checks,
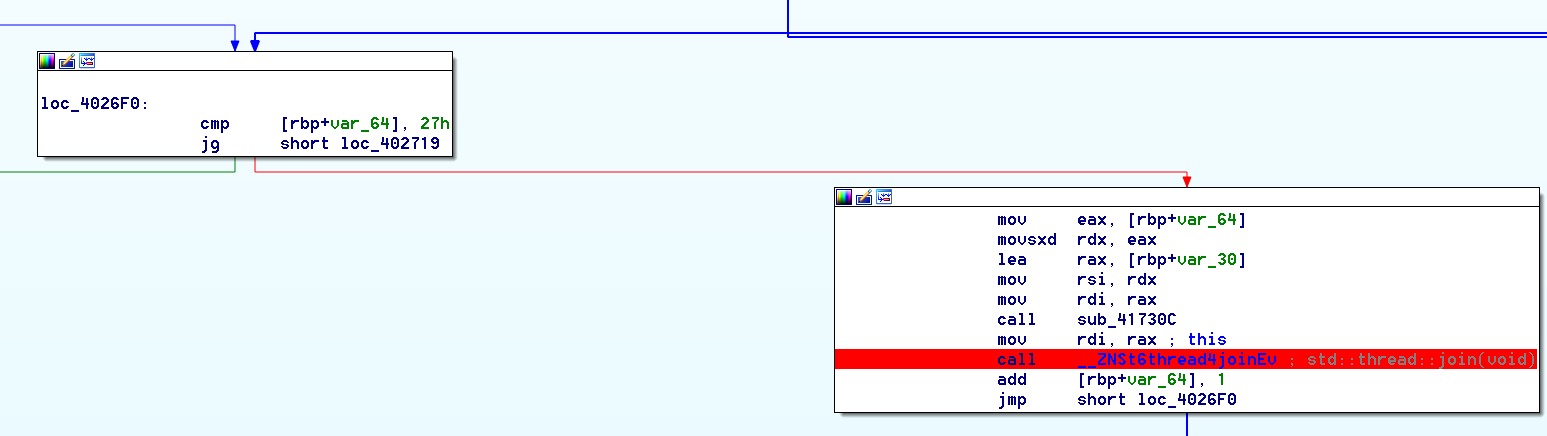
Finally our “GoodBoy”/”BadBoy” messages.
If we look closer, we can see that the checks actually involve a thread::join(), that must means that we will be doing our check in an other thread.
We need to find where these threads have been initialized.
Sure enough, looking at the beginning of our main function, we have an other 0x27 loop :

Inside the sub_41716C is our std::thread::_M_start_thread
The important thing here is that all these threads are initialised with the same code to run, wich is given as a pointer to ESI : sub_401F8F
Analysis of the Threaded function
Let’s get a closer look at that function.
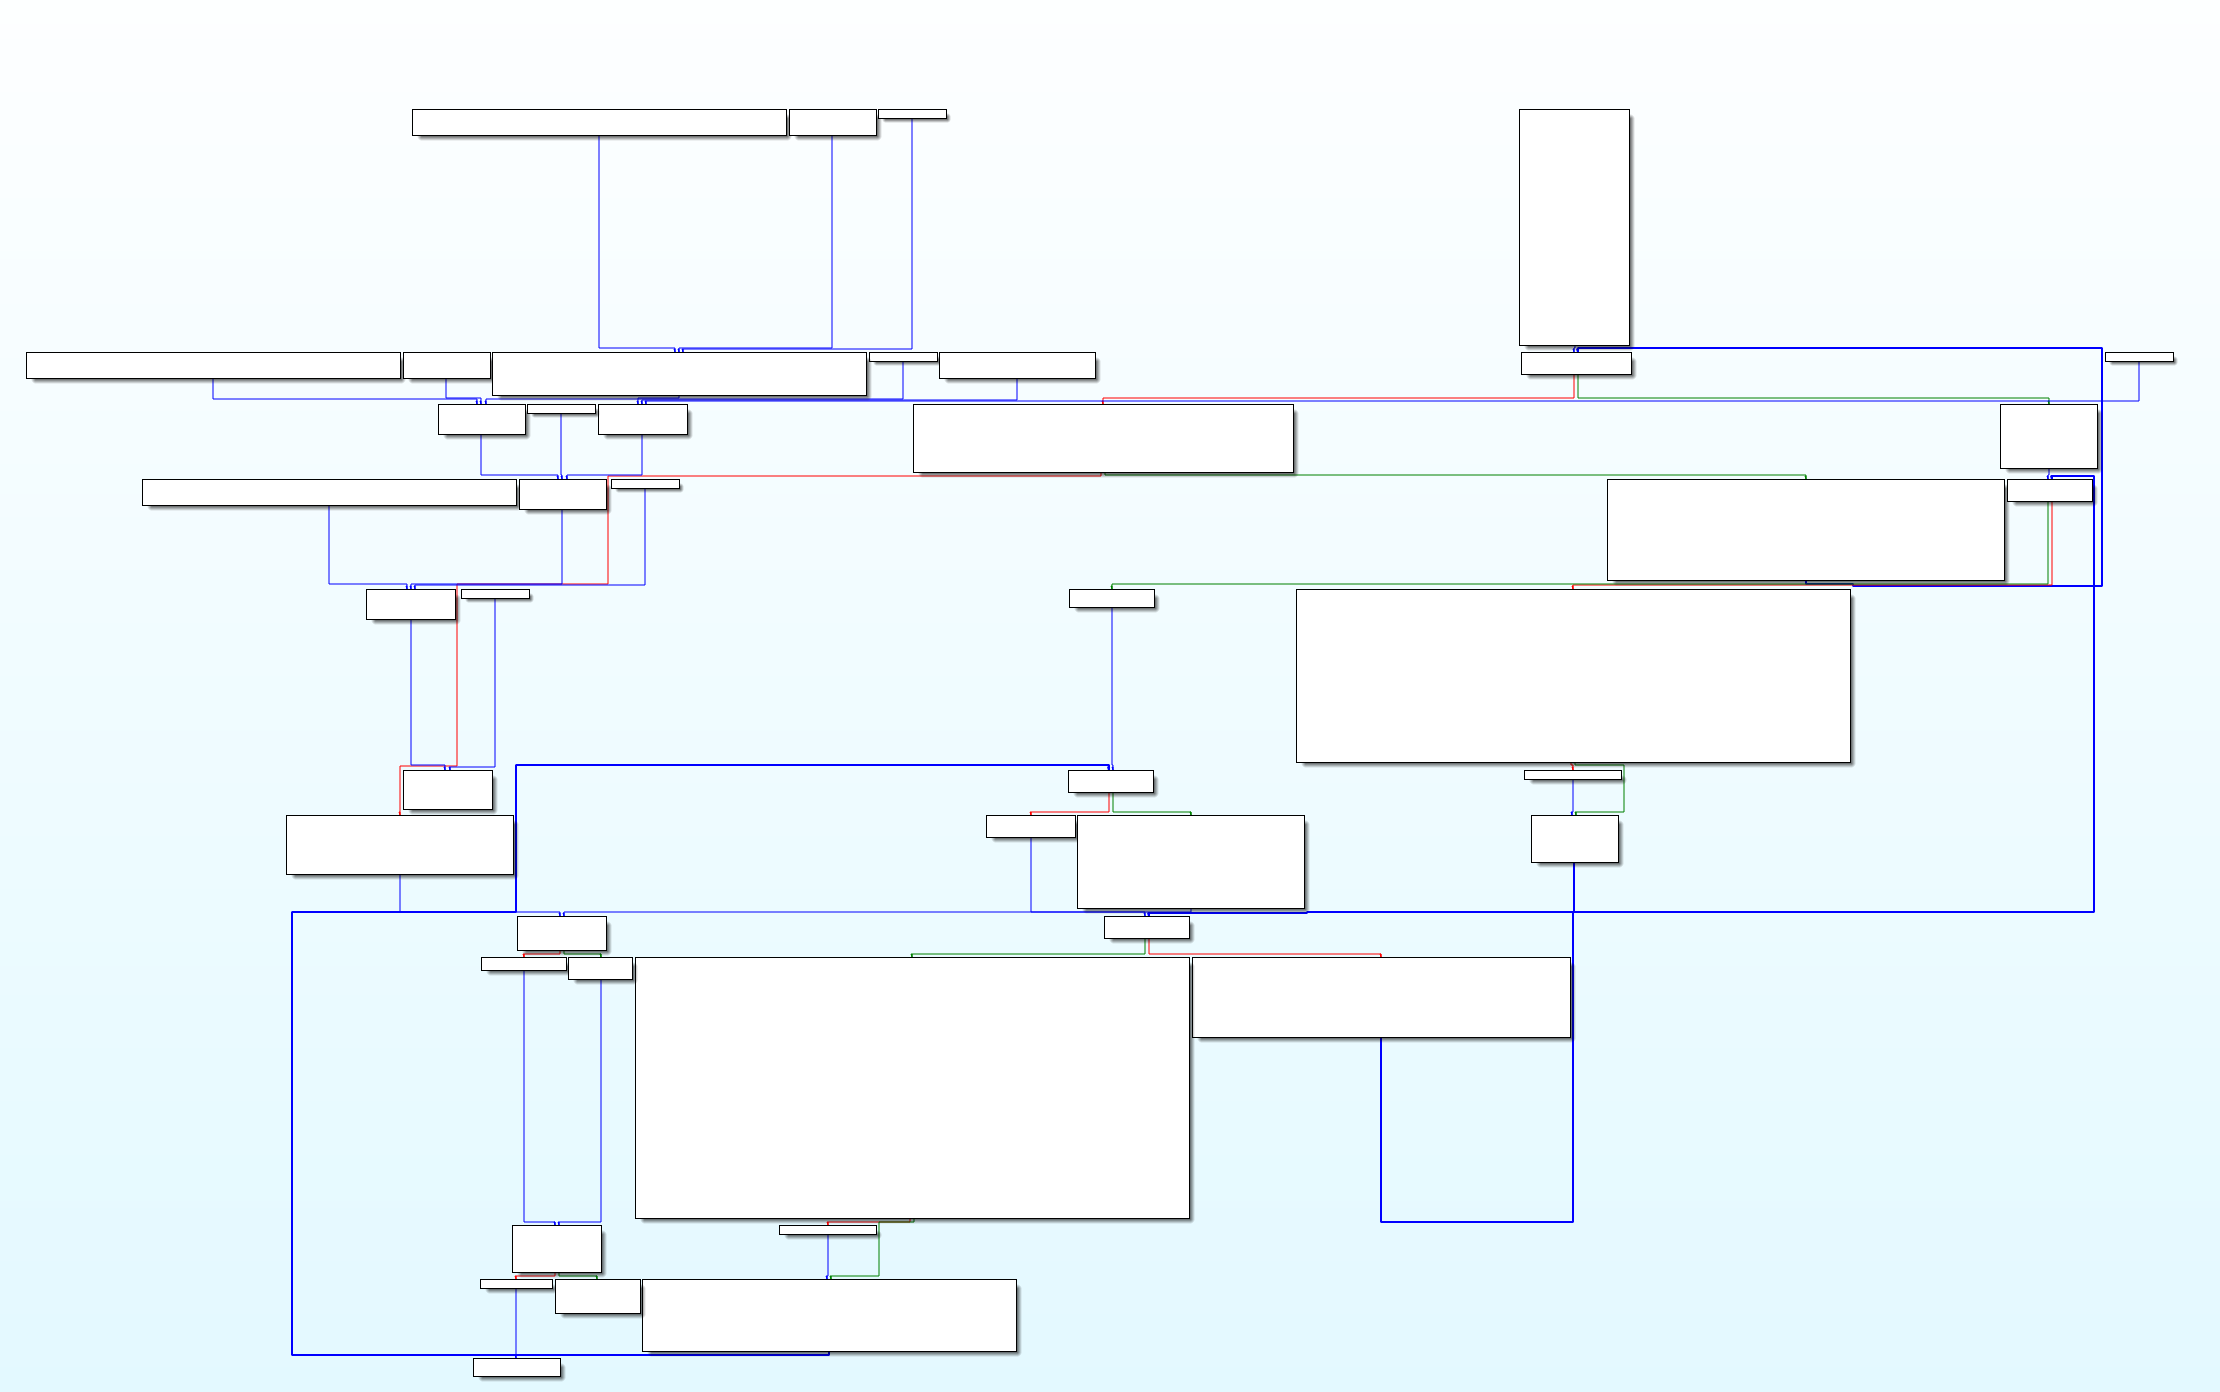
Okay, that seems like a big function, and just looking at the beginning of it, we can see a lot of sub calls.
So at this point, looking at all that code, i usually start doing some dynamic analysis to try to understand when my inputs are used, and what is done with them.
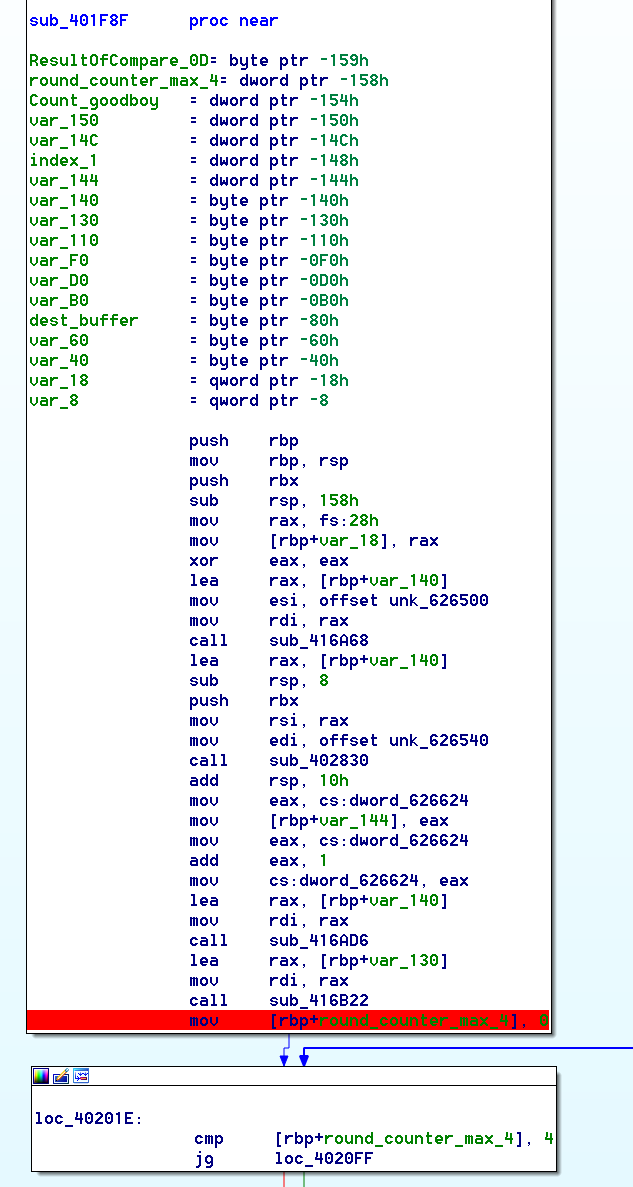
Let’s break on this function just before it start its firsts loops.
Why there? Because one of those previous call is dealing with a mutex lock/unlock, and the part we’ll be interested in is happening after this unlocking.
Quick refresh on how to do dynamic analysis on an ELF binary if you’re like me, running IDA in windows.
You’ll need a VM of the right architecture (Linux x64 here), and the IDA “linux_server” (linux_serverx64 here that you should find in your %IDA%/dbgsrv/ )
In the IDA config, select the “Remote Linux Debugger”
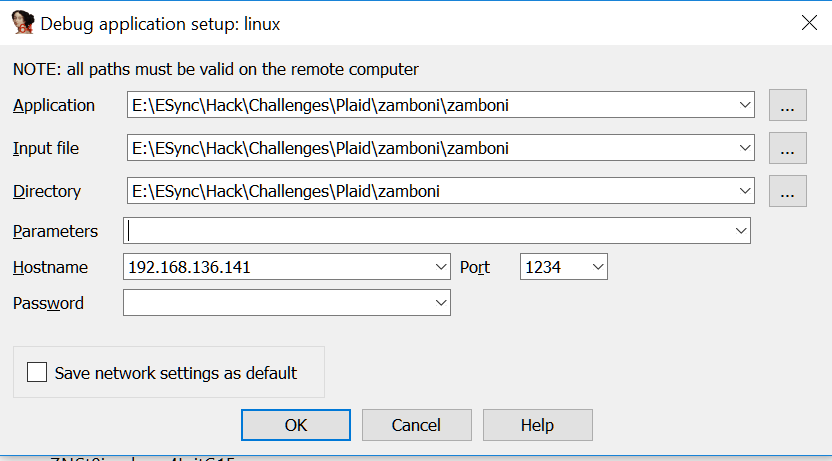
Then go to the “Process Options” : 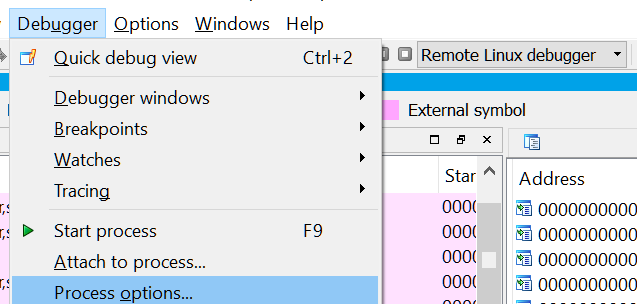
There you can set your hostname and port.
The “parameters” is the list of your arguments
The way IDA deals with Directory is a pain, especially when you do remote debugging. my advice, just copy your “debug_server” in the same directory than your binary, when you’ll run it, it’ll find it locally.
When we first enter this function, when can see on the “thread list” that we are in an other thread.
On the first loop (a 5 times loop, like the number of lines we entered …), we can see that it reads one line, get it size, and compare it with “a value”+1<<3 , wich is equal to “a value+1″*8
Looking closer with a few tests, we can see that depending on witch thread we are in, this value goes from 0 to 0x27. 
We can deduce than our input will have to be :
- 5 lines
- each line is 8*0x27 bytes
This does seem long for a password, but the description is talking about “art”.
As we just played the NuitDuHack Qualifications who had a nice reverse binary with a flag as an ASCII ART, we deduced that is would most likely also be the case here.
Next Block is going to be very interesting: it’s a loop of 5 times (again, 5 times as the number of lines we entered)
At first glance you can see that it ends up with a test, and depending on the result it will increase a counter.
Looking at the counter in the rest of the code, we can see that the next block also ends up increasing this counter depending on the previous test. but this time, it’s a loop of 8 times (8, like the number of char we were checking at the very beginning of the function)
Right after that we have a check to see if it’s equal to 0xd (at loc_4023E7)
0xd=13=5+8 …
What we can also notice in this block is the string constructor and desctructor, with only one call between them. let’s take a look at it :
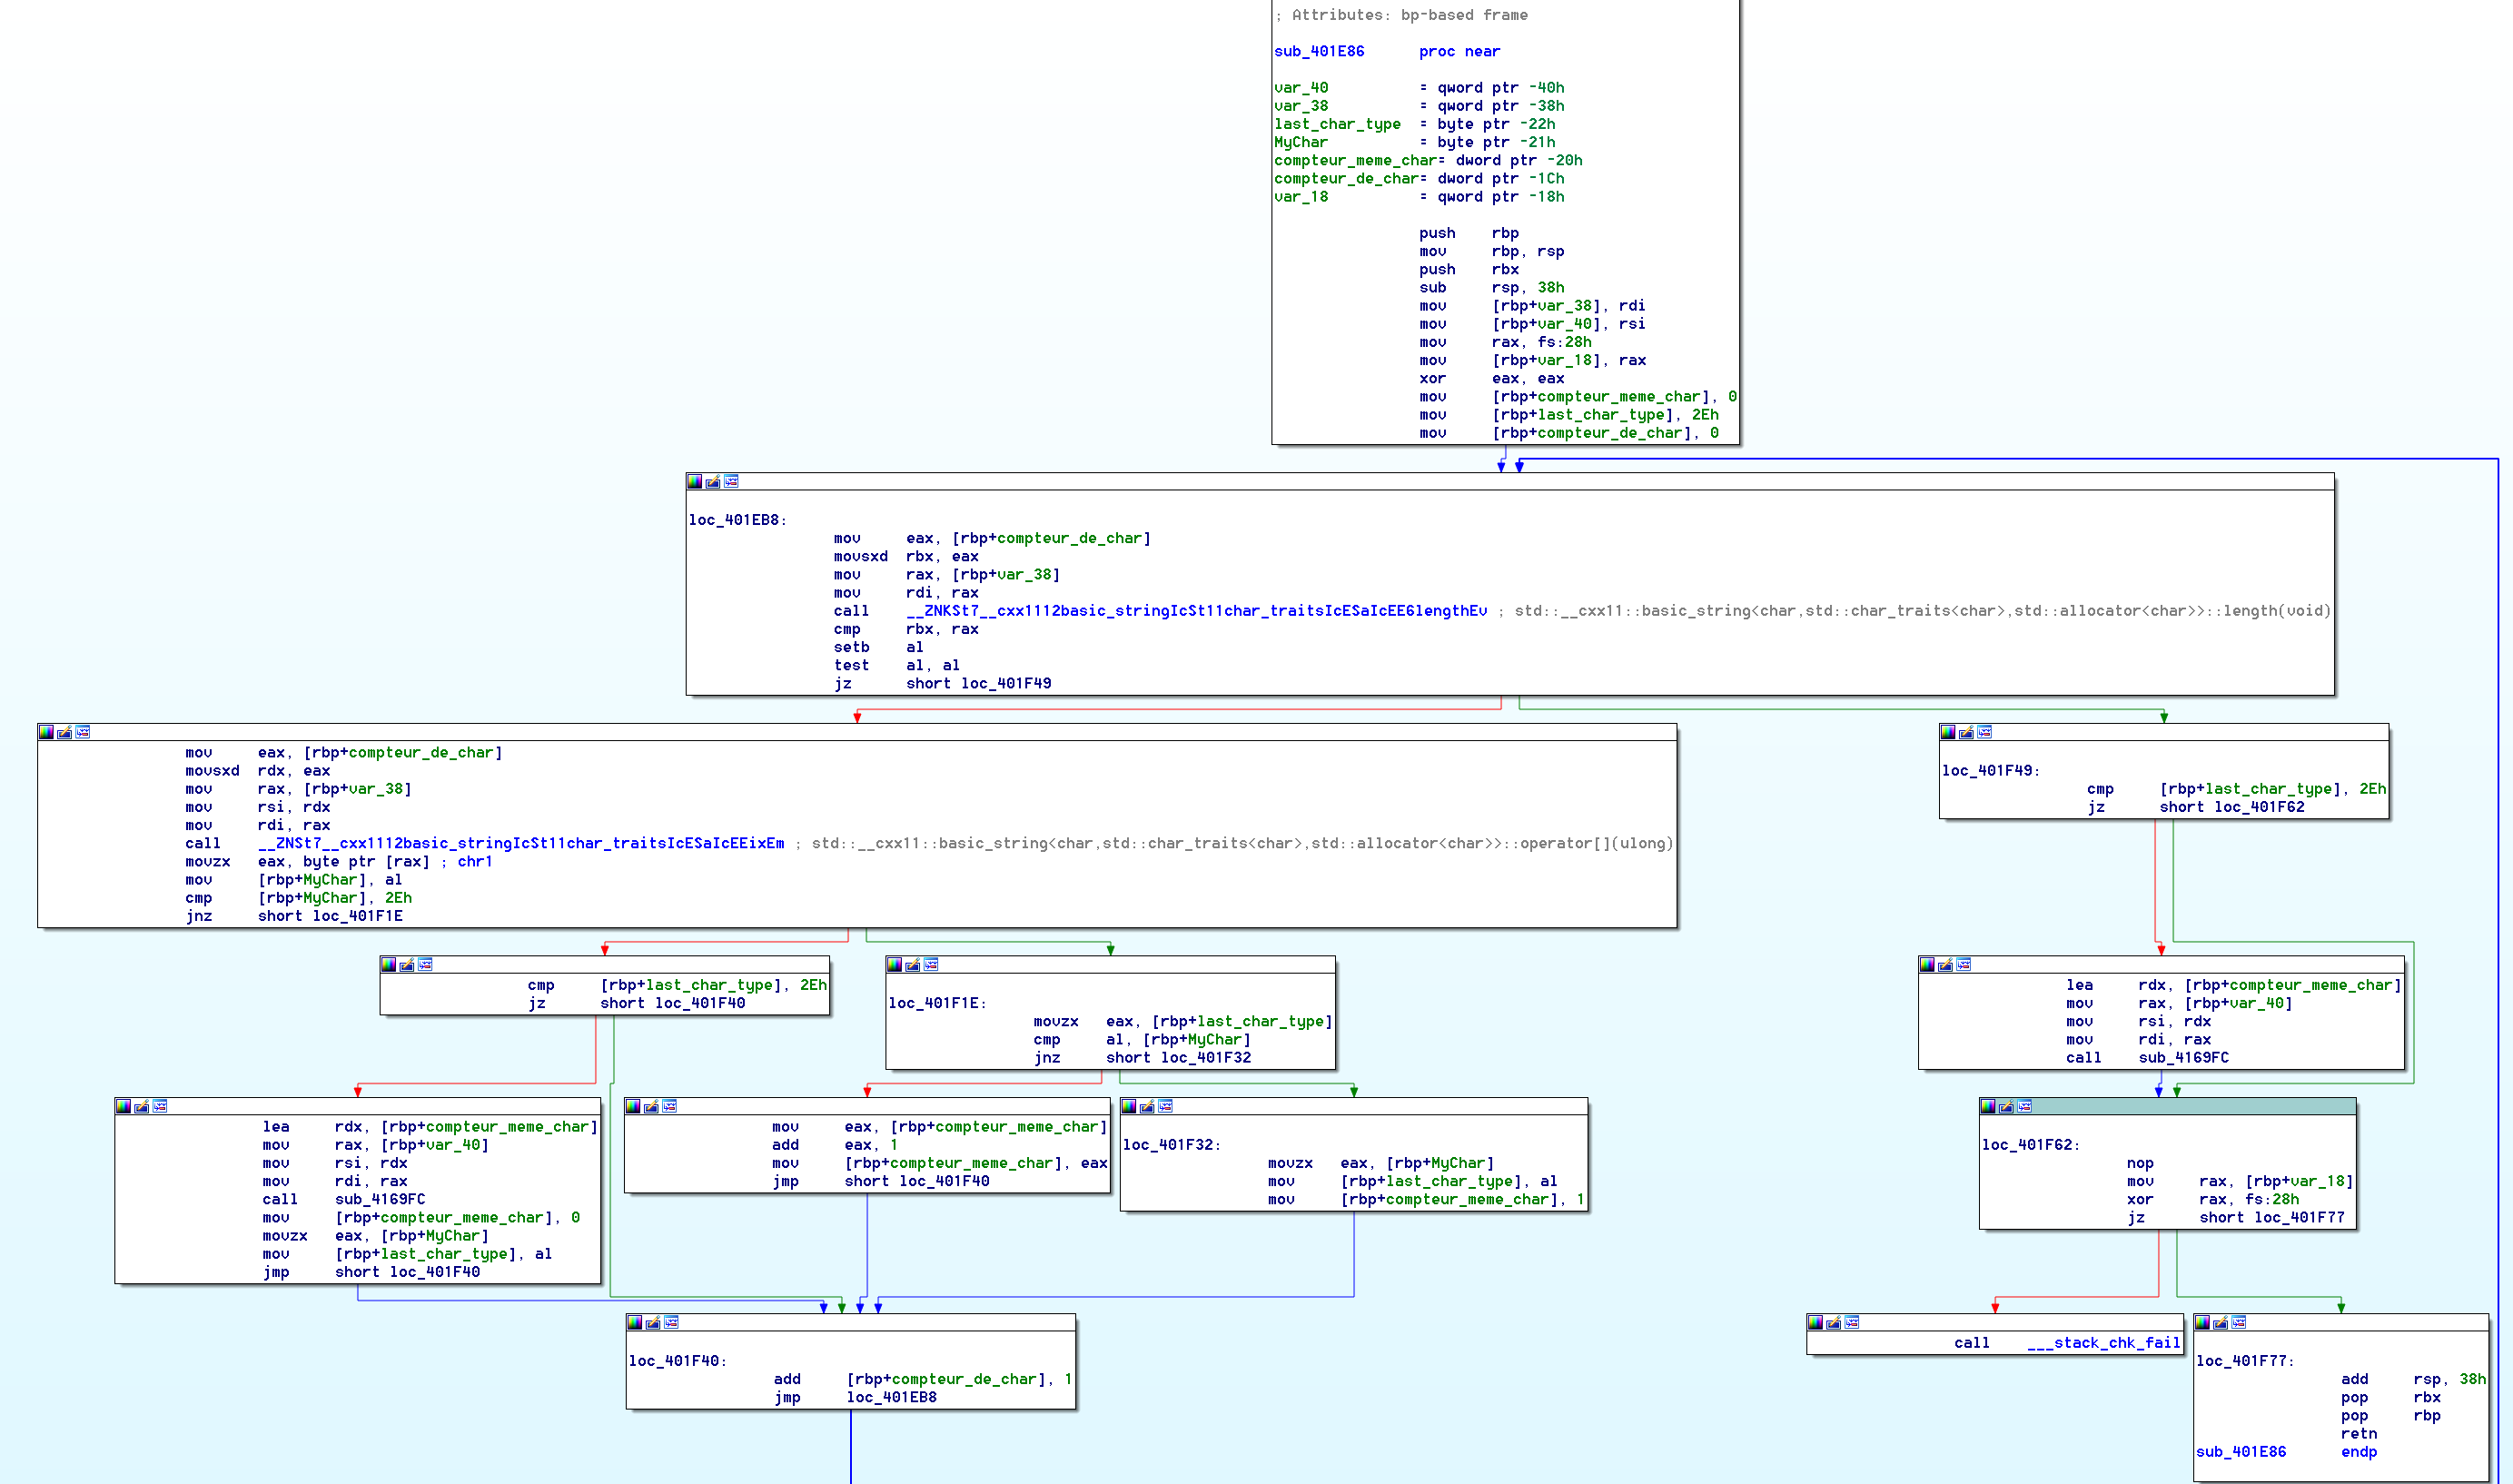
Okay, that’s a big one, but it’s definitively the key !
You can see that it will count the number of identical and consecutive char, separated by 0x2E ( . )
Luckily, i’ve just played a game of “Picross” on this amazing Challenges website : newbiecontest.org
I immediately recognized the principle of that game, also known as nonogram
This function will get a line of char like “## ### # #” and turn it to 2,3,1,1
Now, we understand what’s going on with our input, let’s try to figure out when that will be checked.
You remember our import list with the compare functions, it’s time to look at them deeper.
CTRL+X on the memcmp to see all the XREF, there is only one !
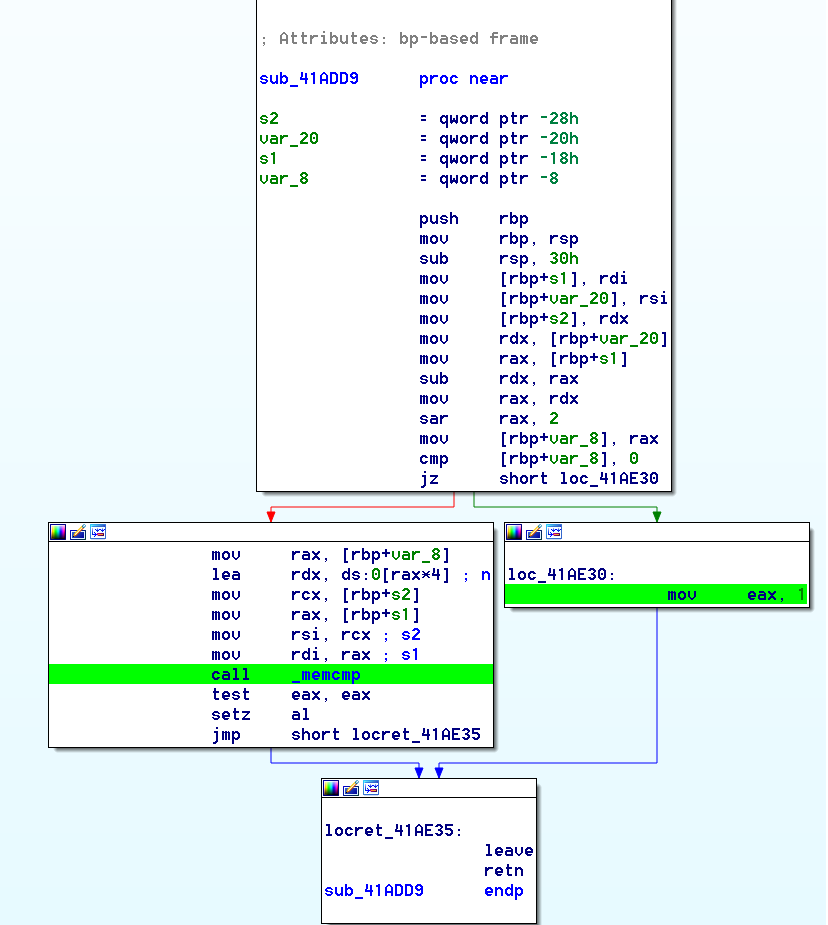
After some testing, we understood that S1 is our input transformed by the “picross function”, S2 is most likely a hardcoded value than we have to mach, and RDX is the size of the input (it does reflect the number of entries in our line : “## ### # #” is 2,3,1,1 and have a size of 4. well 4*4 here as these values are stored as 32 bits integers)
If we XREF this a little bit more, we end up here :
 Just before the test to increase our “goodboy” counter, as expected.
Second Part – Getting the right input
VERY WELL! We now know that our values are compared with hardcoded values.
We looked at the binary sources but couldn’t find a reliable way to extract all the values. We had to script this in order to get the information.
That’s what IDA python is for!
What we need to extract :
- the thread ID (we can have it in the first loop at 0x402048)
- hardcoded values for the lines
- hardcoded values for the rows
We could try to get the values from S2/RSI at the time of the memcmp, that’s what we tried at first.
But there is an other check that is made just before, to verify if our input “size/count” mach the stored values one (“## ### # #” is 2,3,1,1 and have a size of 4. that is the 4 i’m talking about)
We tried to NOP it, but it endend up with some segfaulting. We didn’t understood why, but we had to find another way.
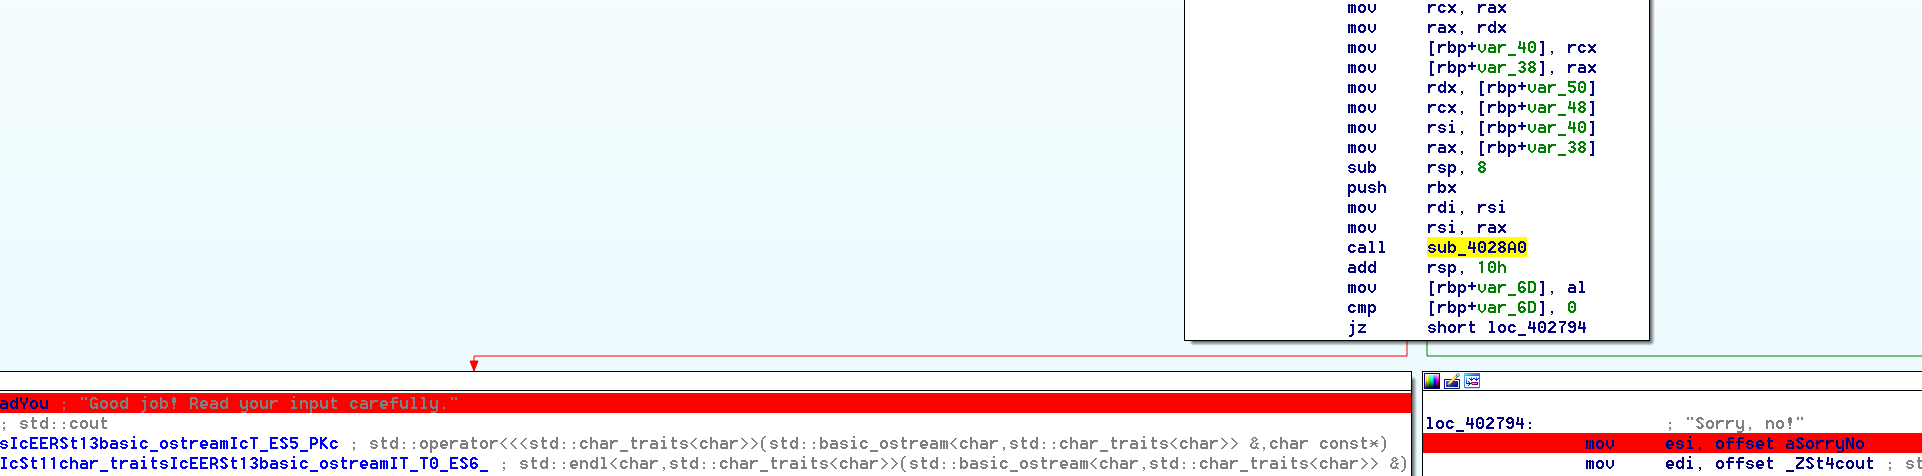
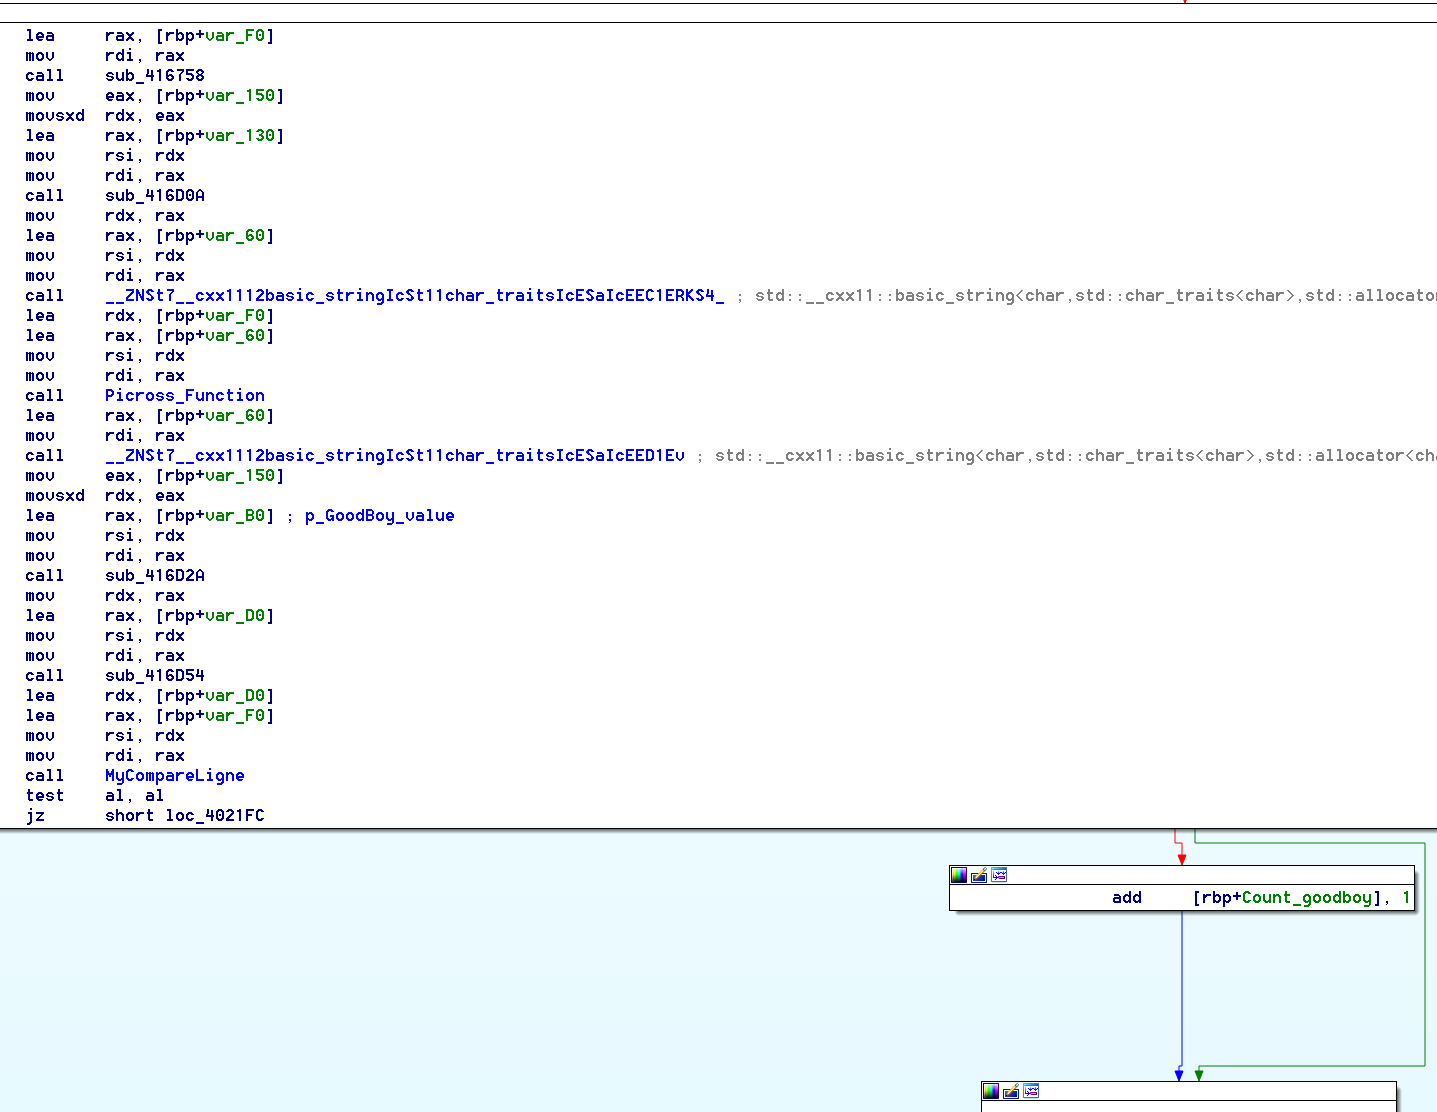
Looking closer to our 2° block structure, we saw that it is passing 2 arguments to our “picrossFunction”, most likely a pointer to our input, and one to the hardcoded value.
Bingo, we can get to the values here : lea rax, [rbp+var_B0] ; p_GoodBoy_value
import idc
import idautils
import idaapi


def BreakpointHandler():
    rdi_loc = GetRegValue("RDI")
    print("RDI adress: %x" % (rdi_loc))
    if rdi_loc == 0:
	datas='0'
    else:
	datas=''
	for val in GetManyBytes(rdi_loc, 0x10,True):
	   datas+="%s"%ord(val)
	   print ord(val)
    print("values: %s" % (datas))
    f=open('raw','ab')
    f.write(datas+"\n")
    f.close()

def BreakpointHandlerGetCharIndex():
    global final
    target = GetRegValue("EAX")
    print "Char %i :"%target
    f=open('raw','ab')
    f.write("Char %i :\n"%target)
    f.close()


if __name__ == '__main__':
    func_getcharindex = 0x0040204E   #EAX = char coord
    func_input2 = 0x004021D8
    func_input3 = 0x0040237E

    #Lets us use python functions for breakpoint conditions
    RunPlugin("python", 3)

    AddBpt(func_input2)
    SetBptCnd(func_input2, "BreakpointHandler()")
    print("Breakpoint at: %x" % func_input2)
    AddBpt(func_input3)
    SetBptCnd(func_input3, "BreakpointHandler()")
    print("Breakpoint at: %x" % func_input3)

    AddBpt(func_getcharindex)
    SetBptCnd(func_getcharindex, "BreakpointHandlerGetCharIndex()")
    print("Breakpoint at: %x" % func_getcharindex)
We end up with a ‘raw’ file, containing our hardcoded values :
Char 0 :
Char 0 :
Char 0 :
Char 0 :
Char 0 :
600000000000
200000000000
400000000000
200000000000
200000000000
0
500000000000
500000000000
100010000000
100010000000
100000000000
100000000000
0
Char 35 :
Char 35 :
Char 35 :
Char 35 :
Char 35 :
600000000000
200000000000
200000000000
200000000000
600000000000
0
100010000000
100010000000
500000000000
500000000000
100010000000
100010000000
0
As we only had 20 minutes left for the CTF, we went for the easy way with an online nonogram solver
doing a quick and dirty parsing to the requiered format, we submited :
0 {“ver”:[[6],[2],[4],[2],[2]],”hor”:[[0],[5],[5],[1],[1],[1],[1],[0]]}
1 {“ver”:[[2],[2],[2],[2],[6]],”hor”:[[0],[5],[5],[1],[1],[1],[1],[0]]}
2 {“ver”:[[4],[2],[6],[2],[2]],”hor”:[[0],[4],[5],[1],[1],[5],[4],[0]]}
3 {“ver”:[[4],[2],[2],[2],[4]],”hor”:[[0],[3],[5],[1],[1],[1],[2],[0]]}
4 {“ver”:[[4],[2],[3],[2],[4]],”hor”:[[0],[1],[1],[5],[2],[1],[1],[0]]}
5 {“ver”:[[2],[4],[2],[2],[2]],”hor”:[[0],[1],[2],[4],[4],[2],[1],[0]]}
6 {“ver”:[[0],[0],[0],[0],[6]],”hor”:[[0],[1],[1],[1],[1],[1],[1],[0]]}
7 {“ver”:[[2],[2],[2],[2],[4]],”hor”:[[0],[4],[5],[1],[1],[5],[4],[0]]}
8 {“ver”:[[0],[0],[0],[0],[6]],”hor”:[[0],[1],[1],[1],[1],[1],[1],[0]]}
9 {“ver”:[[2],[3],[2],[2],[2]],”hor”:[[0],[5],[5],[1],[1],[5],[5],[0]]}
10 {“ver”:[[4],[2],[2],[2],[4]],”hor”:[[0],[3],[5],[1],[1],[5],[3],[0]]}
11 {“ver”:[[0],[0],[0],[0],[6]],”hor”:[[0],[1],[1],[1],[1],[1],[1],[0]]}
…
Which gave us an ASCII ART of : FLAG{Y_U_NO_PERPENDICULAR_CONSTRUCTION?}